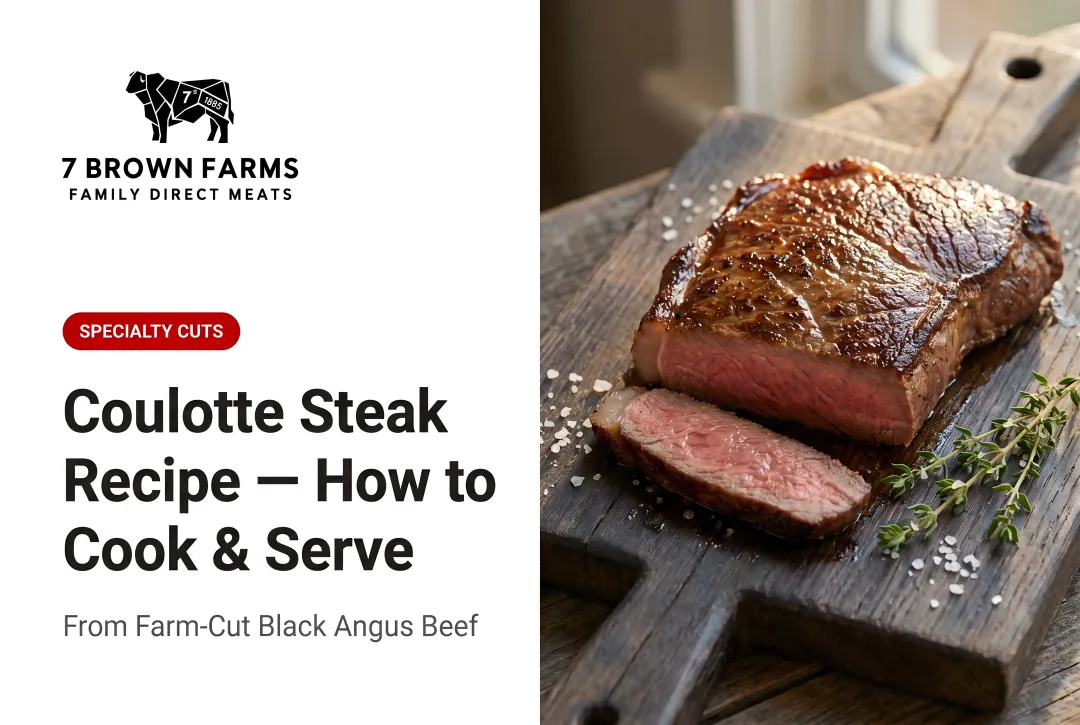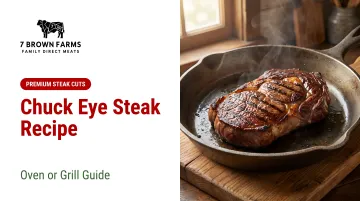
Introduction
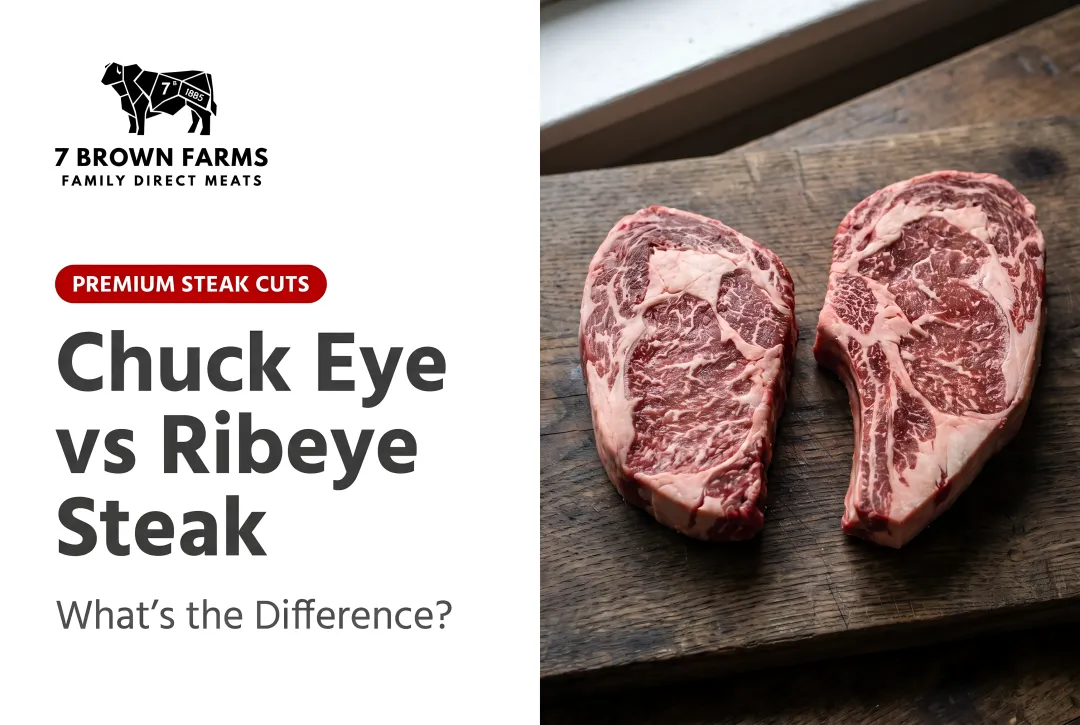
Chuck eye steak sits right next to the ribeye on the cow — same marbling, same beefy depth of flavor — but it costs about half the price. For families who want steakhouse quality without steakhouse spending, it's one of the best cuts you're probably not cooking yet.
The catch: results vary sharply based on method. Your cooking approach (oven vs. grill), steak thickness, and heat management all determine whether you end up with a gray, chewy disappointment or a juicy medium-rare worth repeating. This guide walks through both methods with exact steps so you know what to expect before you ever touch the pan.
Key Takeaways
- Cut from the 5th rib of the chuck primal, chuck eye shares ribeye's muscle and marbling at a fraction of the price
- Both oven (sear + finish) and grill (two-zone heat) methods work well — pick based on your setup and the weather
- Go at least 1 inch thick, prioritize visible marbling, and nail your internal temp for the best result
- Rest 5-10 minutes after cooking, then slice against the grain for maximum tenderness
- Finish with herb butter while the steak rests to add a serious layer of flavor
What Is Chuck Eye Steak and What Makes It Worth Cooking?
Chuck eye steak comes from the 5th rib of the chuck primal — the shoulder section directly adjacent to the ribeye (ribs 6-12). Because the same longissimus dorsi muscle runs through both cuts, chuck eye shares ribeye's characteristic tenderness and marbling in a way that other chuck cuts simply do not.
Being cut so close to the ribeye is exactly why chuck eye delivers ribeye-quality flavor at a fraction of the cost.
The "Poor Man's Ribeye" Nickname
Only two chuck eye steaks come from each animal, which historically made them an insider favorite among butchers who recognized their value. You may see chuck eye labeled as "chuck filet steak" or "Delmonico steak" in stores, though the Delmonico designation is often a marketing tactic rather than an accurate descriptor.
Important distinction: Chuck eye steak is NOT the same as generic chuck steak, which requires braising and a completely different cooking approach. Chuck eye is a tender, quick-cooking cut suitable for high-heat methods.
Why Chuck Eye Costs Less Despite Its Quality
Chuck eye is priced lower than ribeye because it's cut from the shoulder, a section traditionally classified as a working muscle and therefore priced lower in the commodity beef market. USDA retail reports show chuck eye frequently retails around $6.99/lb compared to $14.54/lb for ribeye — roughly a 50% discount for nearly identical muscle structure.
That price advantage only holds up when the sourcing is right. Animal quality makes a significant difference at this price point — a well-marbled Black Angus chuck eye from a farm like 7 Brown Farms, where cattle are always marbled and 14-day dry-aged, can produce a cut that genuinely rivals a steakhouse ribeye.
The dry-aging process does two things for this cut specifically:
- Reduces surface moisture, which accelerates crust formation during high-heat cooking
- Concentrates the beef's natural flavor without any added marinades or seasonings
Ingredients and Equipment for Perfect Chuck Eye Steak
The ingredient list is short on purpose — chuck eye has enough natural flavor that it doesn't need much help.
Core ingredients:
- Chuck eye steaks — 1 to 1.5 inches thick, with visible white marbling throughout (not just around the edges)
- Coarse kosher or sea salt — larger crystals penetrate the meat better than fine table salt
- Freshly ground black pepper — pre-ground loses its aromatic oils fast; grind it fresh
- Neutral high-smoke-point oil — avocado oil (500°F+) or light olive oil (410°F) both work well
- Unsalted butter — for finishing
Herb Butter (Optional but Recommended)
Herb butter melts into the steak during the rest and adds a layer of richness that ties everything together. Combine softened unsalted butter with minced garlic and chopped fresh thyme and rosemary — or swap in parsley, cilantro, or chives. Make it ahead and refrigerate so you can slice it into pats right when the steak comes off the heat.
Equipment
Required tools:
- Cast iron skillet — holds and radiates heat evenly for a proper crust; nonstick pans can't take the heat required
- Instant-read meat thermometer — the only reliable way to hit your target doneness
- Aluminum foil — for loosely tenting the steak during its rest
- Short wooden skewers (optional) — if the seam starts to separate during cooking, skewer it to hold the shape
How to Cook Chuck Eye Steak in the Oven
This is the recommended indoor method: it combines a high-heat stovetop sear for crust formation with a controlled oven finish to bring the center to exact doneness without overcooking the exterior.
Step 1: Season and Dry-Rest the Steaks
Pat steaks completely dry with paper towels. Surface moisture is the enemy of a good sear: it causes steaming instead of browning. The Maillard browning reaction requires surface temperatures of at least 300°F, but surface moisture caps temperatures at 212°F.
Season both sides generously with coarse salt and black pepper. Place seasoned steaks uncovered on a wire rack over a baking sheet and refrigerate for 30 minutes to 4 hours. The dry refrigerator environment draws surface moisture away, which intensifies crust formation during cooking.
Step 2: Bring to Temperature and Prep the Pan
Remove steaks from the refrigerator and allow them to rest at room temperature for 15-20 minutes before cooking. Preheat oven to 450°F.
Meanwhile, heat a large cast iron skillet over medium-high heat until very hot, about 2-3 minutes. Add oil and let it shimmer before placing steaks in the pan.
Cast iron's high thermal capacity prevents a massive temperature drop when cold steak hits the surface, keeping the sear aggressive and continuous.
Step 3: Sear Both Sides
Place steaks in the hot skillet without crowding and sear for about 2 minutes per side until a deeply browned crust forms. Resist the urge to move them while searing: contact with the pan surface is what builds the crust. Flip with tongs rather than pressing down, which squeezes out juices.
Step 4: Transfer to Oven and Cook to Temperature
Move the cast iron skillet directly to the preheated oven and cook to your target temperature:
Doneness guide (for 1.5-inch steaks):
- Rare - Pull at 120°F (~3-4 min)
- Medium-Rare - Pull at 130°F (~4-5 min)
- Medium - Pull at 140°F (~5-6 min)
- Medium-Well - Pull at 150°F (~6-7 min)
- Well - Pull at 160°F (~7-8 min)
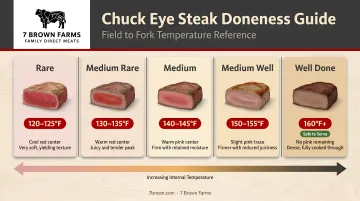
Carry-over cooking will raise internal temperature by ~5°F during rest. Pull steaks slightly before target temperature to account for this. Note that 1-inch steaks may not need oven time at all after searing.
Step 5: Add Butter and Rest
Transfer steaks immediately from the skillet to a cutting board. Don't rest them in the hot pan: residual heat will keep cooking the meat. Top each steak with a pat of herb butter, tent loosely with aluminum foil, and rest for 5-10 minutes.
Resting lets muscle fibers relax and reabsorb juices pushed toward the center during cooking. Slice thinly against the grain and serve.
How to Cook Chuck Eye Steak on the Grill
Grilling is the preferred outdoor method and is especially well-suited to chuck eye because its marbling releases fat during cooking that keeps the steak juicy even over high direct heat.
Step 1: Season, Dry-Rest, and Prep the Grill
Follow the same salt-and-pepper seasoning and refrigerator dry-rest from the oven method.
When ready to cook, oil the grill grates lightly with high-smoke-point oil and preheat the grill to high—targeting 500°F. Allow the grill to preheat for at least 15 minutes to ensure the cooking grates reach proper searing temperature.
If steaks have multiple loosely connected sections, insert two short wooden skewers (pre-soaked in water for 15 minutes) through the sides of each steak to hold muscle groups together for even cooking.
Step 2: Sear Over Direct Heat
Place steaks on the hot grate over direct heat. Close the lid and sear for 2 minutes. Flip, close the lid again, and sear for 2 more minutes. The closed lid traps heat around the steak and promotes faster, more even browning.
Step 3: Reduce Heat and Finish to Doneness
Reduce the grill to medium-low. Continue cooking with the lid closed until steaks reach desired internal temperature:
- Rare: 120°F (1-2 more min)
- Medium-Rare: 130°F (2-3 more min)
- Medium: 140°F (3-4 more min)
Use an instant-read thermometer and pull steaks slightly before target temp to account for carry-over cooking.
Step 4: Rest, Butter, and Slice
Remove from grill, transfer to a cutting board, top with herb butter, and rest 5-10 minutes before slicing against the grain. Chimichurri sauce is a natural pairing here — its acidity cuts through the richness, and it takes about 5 minutes to make while the steak rests. Grilled corn or roasted peppers round out the plate.
Key Variables That Determine How Your Chuck Eye Steak Turns Out
Even with the right method, small variables have an outsized impact on the final result. Understanding them separates a good steak from a great one.
Steak Thickness and Marbling
These are the most important starting-point variables. Steaks under 1 inch are harder to cook to medium-rare without overcooking the exterior. More marbling means more internal fat that bastes the meat from the inside, protecting against dryness and adding flavor. A few practical effects:
- Thin steaks hit target temperature before the exterior crust fully develops — producing gray interiors and pale rather than caramelized crusts
- Well-marbled chuck eye has reduced surface moisture naturally, which accelerates Maillard reaction crust formation
- 14-day dry-aged Black Angus (like cuts from 7 Brown Farms) concentrates that marbling effect further, requiring less prep to get the same result
Look for visible white fat running through the meat (not just around the edges) and ask your butcher or source specifically for chuck eye with good marbling.
Internal Temperature and Carry-Over Cooking
Chuck eye, like ribeye, is best at medium-rare to medium (130–145°F). Above that, fat begins to render too fast and connective tissue tightens, making the steak chewier.
Chuck eye has slightly more connective tissue than pure ribeye. Research confirms that cooking beyond medium causes this tissue to contract noticeably, leaving the steak feeling tough even when the cook was technically correct — just at the wrong temperature.
Because of carry-over cooking (internal temperature continues rising ~5°F after you pull it from heat), always remove the steak slightly before your target temperature.
Resting Time
During cooking, heat drives moisture toward the center of the steak. Resting allows that moisture to redistribute throughout the meat. Cutting too early spills that juice onto the cutting board instead of into each bite. Plan for a 5–10 minute rest — it's the difference between juicy bites and a puddle on your board.
Slicing Direction
Cutting against the grain (perpendicular to the visible muscle fibers) shortens those fibers, making each bite physically easier to chew. Chuck eye has a visible grain — identify the direction of the muscle fiber lines and slice perpendicular to them.
Common Mistakes When Cooking Chuck Eye Steak (and How to Fix Them)
Chuck eye is a forgiving cut, but a few common missteps will consistently undercut the result. Here's what to watch for.
Skipping the Dry-Rest or Cooking Cold Steaks
Cooking a steak directly from the refrigerator results in uneven cooking—the outside overcooks before the center reaches temperature. Placing a cold steak onto a grill or into a hot pan causes the meat to contract rapidly, pushing out juices.
Always plan for at least 15 minutes of counter rest before the pan or grill. For the best crust, a refrigerator dry-rest helps too — even 30 minutes makes a visible difference in how the surface browns.
Using a Pan That Isn't Hot Enough (or the Wrong Pan)
Adding steak to a pan that hasn't fully preheated results in a gray, steamed exterior rather than a caramelized crust. Nonstick pans cannot withstand the high heat required and will not produce the same result.
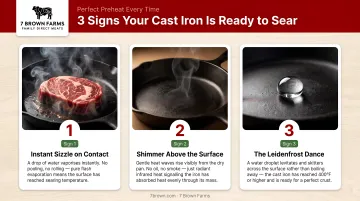
Switch to cast iron or a heavy stainless steel pan and allow at least 2–3 minutes of preheat on medium-high before the steak goes in. You'll know it's ready when:
- Oil shimmers immediately on contact
- A faint wisp of smoke rises from the surface
- The pan feels radiantly hot when held 2–3 inches above it
Cutting Immediately After Cooking / Cutting With the Grain
Both mistakes result in dry, chewy steak. Cutting too soon spills juices; cutting with the grain leaves long muscle fibers intact, making each bite feel stringy.
Rest the steak tented under foil for at least 5–10 minutes before cutting. Chuck eye has an irregular grain, so look for the visible muscle fiber lines running across the surface and orient your knife perpendicular to them — that single adjustment makes the difference between a chewy bite and a tender one.
Frequently Asked Questions
What's the best way to cook chuck eye steak?
The best method is a hot sear in a cast iron skillet followed by a brief oven finish at 450°F (or a two-zone grill method) to control internal temperature. Start with a dry surface, cook to medium-rare (130°F), and rest before slicing for the most juicy, flavorful outcome.
How do you make chuck eye steak tender?
Don't overcook past medium. Muscle fibers and connective tissue tighten above ~145°F. Always rest the steak 5-10 minutes before slicing, and cut against the grain. Marbling quality also plays a role; well-marbled chuck eye is naturally more forgiving.
How long should you grill a chuck eye steak?
For a 1.5-inch steak, sear 2 minutes per side over direct high heat, then reduce to medium-low and finish 2-3 more minutes for medium-rare. A meat thermometer is the only reliable way to hit exact doneness, since timing varies by steak thickness.
Is chuck eye a good cut of steak?
Yes. It's comparable in flavor and tenderness to ribeye, coming from the adjacent 5th rib and sharing the same primary muscle. The main drawback is limited availability (only two per animal), so it's worth buying when you find it.
What are common mistakes when cooking chuck eye steak?
Three mistakes consistently hurt results:
- Cooking straight from the fridge instead of letting the steak reach room temperature first
- Using a pan that isn't hot enough, which prevents proper crust formation
- Cutting immediately after cooking, or slicing with the grain instead of against it
Why is chuck eye so cheap?
Chuck eye is priced lower because the shoulder (chuck primal) is classified as a working muscle section, historically associated with tougher cuts. Chuck eye is an exception to that rule, but its obscurity and position within a budget-priced primal keeps market pricing well below ribeye despite comparable eating quality.