Introduction
Most home cooks know ribeye and strip steak cold. But picanha? This prized Brazilian steakhouse cut sits right under their noses—literally in the top sirloin section—yet rarely makes it home from the butcher shop. The name alone ("pee-KAHN-yah") sounds exotic. The thick fat cap running across one side looks intimidating. And the triangular shape doesn't fit neatly into anyone's mental image of "steak."
Most people either undercook that fat cap—leaving it chewy and unrendered—or overshoot the internal temp by searing first, turning a premium cut into expensive shoe leather.
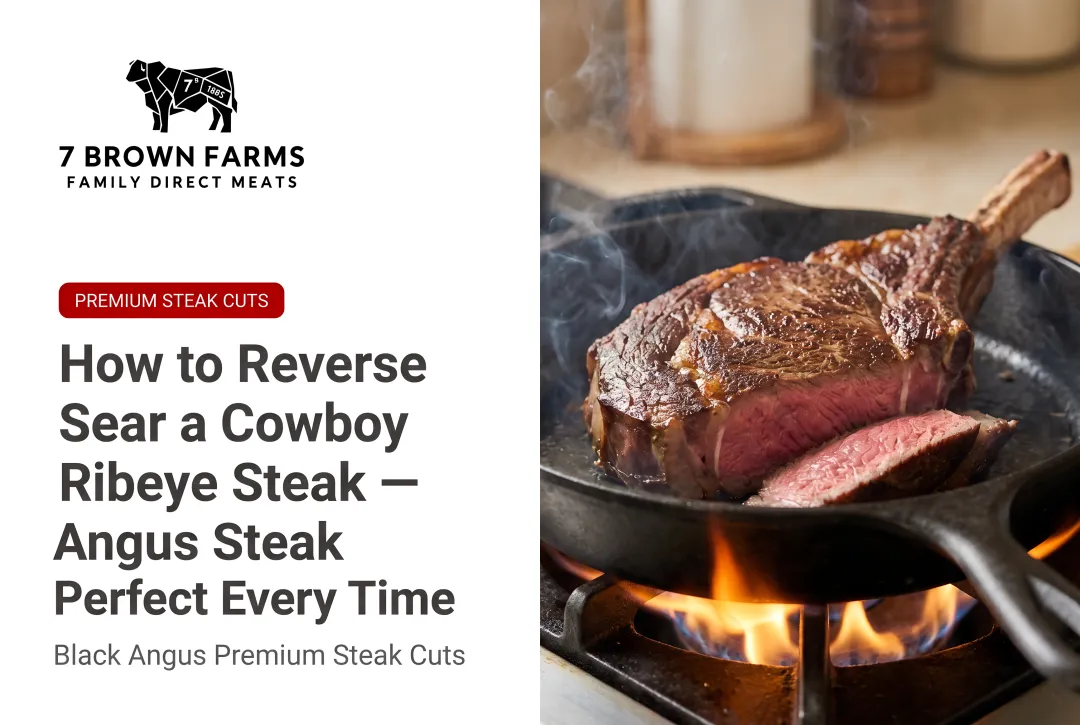
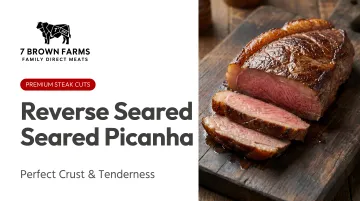
The reverse sear technique fixes both problems. Low heat renders the fat slowly and evenly. High heat at the end builds a dark, caramelized crust, and the beef comes out edge-to-edge pink with a fat cap that crisps like bacon. This guide walks through the proven method with clear temperature targets so you nail it the first time.
TLDR:
- Picanha is a triangular top sirloin cap cut with a thick fat cap that bastes the lean muscle as it cooks
- Reverse searing (slow cook first, sear second) prevents overcooking and allows the fat cap to render properly
- Pull from low heat at 110-115°F, sear at 500°F+, and finish at 125-130°F for perfect medium-rare
- Score the fat cap in a crosshatch, dry brine overnight, and slice against the grain after resting
- Source well-marbled Black Angus picanha—like the single-estate cuts from 7 Brown Farms—for better fat rendering and deeper flavor before the grill even heats up
What Is Picanha?
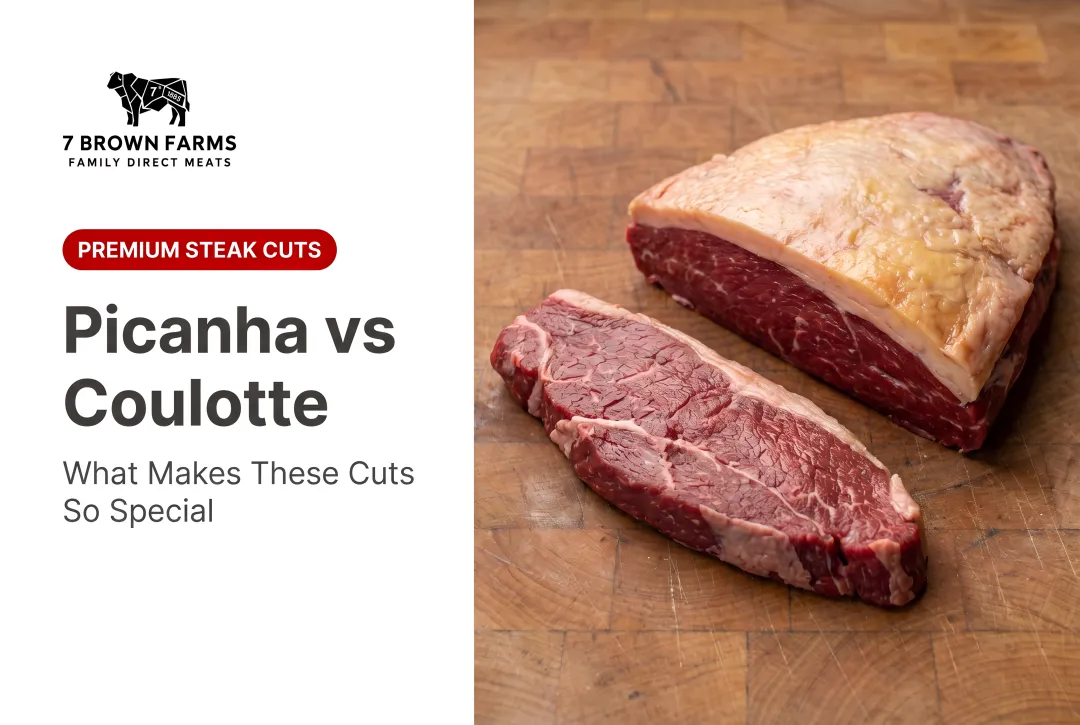
Picanha—also called top sirloin cap, rump cap, or coulotte—is a triangular cut from the rump area where the top sirloin meets the round. Under USDA classification, it's officially Item No. 184D: Beef Loin, Top Sirloin Butt, Cap. The muscle itself is the M. biceps femoris, a relatively lean working muscle that would be forgettable if not for one defining feature: a thick fat cap running across the top, typically 0.5 to 1 inch thick.
This fat cap is what separates picanha from every other lean cut. Unlike marbling, which is woven through the muscle, this external fat sits on top. As it renders during cooking, it melts down and continuously bastes the lean flesh below. The fat acts as both a heat shield and a flavor delivery system — which is why technique matters so much for this cut.
The fat cap compensates for the lean muscle — but only if you render it properly. How you apply heat makes all the difference:
- High direct heat: fat flares up, chars unevenly, interior overcooks before the cap crisps
- Controlled low heat first: fat renders gradually, transforming into a caramelized, bacon-like crust while the meat stays tender
Sourcing directly shapes the outcome. A well-marbled picanha from quality Black Angus cattle will have thicker fat coverage, richer flavor, and better heat response than commodity cuts. 7 Brown Farms' 100% American Black Angus picanha arrives 14-day dry-aged with USDA Prime or Near Prime marbling. That starting point — fat cap thickness, intramuscular marbling, and how the beef responds to heat — determines how much the reverse sear method can deliver.
Why Reverse Sear Is the Best Method for Picanha
The Core Concept
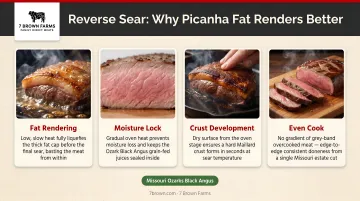
Reverse searing works by doing things in reverse order: you cook the meat low and slow at 225–250°F until it approaches your target internal temperature, then finish with a high-heat sear to develop the crust. The traditional approach creates a steep temperature gradient—the outside overcooks while the center struggles to catch up, leaving a thick "gray band" of overcooked meat beneath the surface.
Low-temperature roasting minimizes this gradient. The meat cooks evenly from edge to center, so when you pull it at 110-115°F internally, the entire roast sits within a narrow temperature range. The brief sear at the end develops crust without pushing the interior past medium-rare.
Why Picanha's Anatomy Demands the Reverse Sear
Picanha's structure — thick fat cap, lean muscle beneath — makes it particularly well-suited to this approach. Here's why each element benefits:
- Fat cap rendering: High heat causes flare-ups, uneven rendering, and a greasy texture. The 45–60 minute slow phase lets the fat melt gradually, creating a dry surface primed for caramelization.
- Maillard reaction: The Maillard reaction (the chemical process between amino acids and sugars that browns crusts) needs temperatures above 300°F. Water can't exceed 212°F, and evaporating it takes five times more energy than heating it, so a wet surface kills crust development. The slow phase dries the fat cap into a pellicle — when it hits a 500°F+ grill, browning happens in 1–2 minutes without overcooking the interior.
- Moisture retention: Low-and-slow cooking reduces moisture loss from 25% to just 9.25% compared to high-heat roasting. Proteins shrink less, expel fewer juices, and the brief final sear doesn't undo that.
- Repeatability: A thermometer removes the guesswork entirely. Pull at 110–115°F during the slow phase, sear, and finish at 125–130°F for medium-rare. The checkpoints are consistent and repeatable, even for first-time cooks.
How to Prep Your Picanha Before Cooking
Trimming and Scoring the Fat Cap
The ideal fat cap thickness is 0.5 to 0.75 inches. Thicker than that and it won't render completely; thinner, and you lose the self-basting effect. If the fat overhangs the edges of the triangular cut, trim those sections flush — but leave the cap intact over the top of the meat. Don't remove it entirely. That fat is the entire point of picanha.
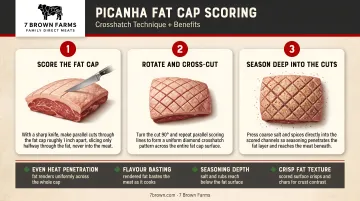
Next, score the fat in a crosshatch pattern. Use a sharp knife to cut diagonal lines about 1 inch apart through the fat, stopping just before you hit the meat. Rotate 90 degrees and repeat to create a diamond pattern. Scoring accomplishes three things:
- Allows the fat to render more evenly by creating channels for melted fat to escape
- Creates more surface area for seasoning to penetrate
- Helps the final sear develop crust across the entire cap rather than in isolated pockets
Flip the picanha over to the non-fat-cap side and check for silverskin — the thin, silvery membrane running across the muscle. It doesn't render, and it creates a tough, chewy texture. Slide a knife under it and cut it away in strips before moving on.
Dry Brining and Seasoning
Season the entire picanha with kosher salt — roughly 1 teaspoon per pound of meat. Place it uncovered on a wire rack over a sheet pan and refrigerate for at least 2 hours, ideally overnight.
The salt draws out surface moisture through osmosis. That moisture dissolves the salt, then gets reabsorbed into the muscle — seasoning the meat deeply and drying the fat cap surface for better crust development.
Salt and freshly cracked black pepper is all this cut needs. Well-marbled, dry-aged Black Angus — like 7 Brown Farms' picanha, raised on a single Missouri Ozarks estate — carries enough depth on its own. If you want to add complexity without masking the beef, a light dusting of one of these works:
- Smoked paprika
- Mustard powder
- A pinch of brown sugar
Don't bury a premium cut under a heavy rub. Keep it minimal.
Before cooking, let the picanha sit at room temperature for 30 minutes. This won't raise the internal temp much, but it takes the chill off the surface and promotes more even heat penetration during the slow phase.
The Reverse Sear Process: Step-by-Step
Phase 1: The Low and Slow Cook
Set up for indirect heat: Preheat your grill, smoker, or oven to 225-250°F. For a grill or smoker, set up a two-zone fire with coals or burners on one side only. Place the picanha fat-side up on the indirect side, away from direct flame. (For ovens, place the picanha on a rack over a baking sheet.)
If using a smoker or pellet grill, this phase adds subtle smoke flavor that amplifies the beef's richness without masking the beef's natural flavor.
Monitor internal temperature: Insert a wireless meat thermometer into the thickest part of the roast. Watch the temp climb gradually. Pull the picanha from heat when it reaches 110-115°F internally—this typically takes 45-60 minutes depending on the size and starting temperature of the cut.
Pre-sear rest: Once pulled, let the picanha rest for 10-15 minutes. Surface moisture evaporates during this window, which sets up a better sear. It also gives you time to crank the heat without the meat continuing to cook on a warm surface.
Phase 2: The High-Heat Sear
Heat the searing surface: Get your charcoal grill, cast iron grill grate, or heavy skillet as hot as possible—500°F minimum, higher is better. A super-hot surface means less time searing, which means less risk of pushing the internal temp past your target.
Sear the fat cap first: Place the picanha fat-side down and press slightly for full contact. On an open grill, expect flare-ups as the fat renders quickly. Sear for 1-2 minutes per side, watching the color closely, then flip and repeat on the bottom.
Final temperature targets:
| Doneness | Pull Temperature (Pre-Sear) | Final Temp After Rest |
|---|---|---|
| Rare | 105°F | 120°F |
| Medium-Rare | 110-115°F | 125-130°F |
| Medium | 125°F | 135-140°F |
| Medium-Well | 135°F | 145-150°F |
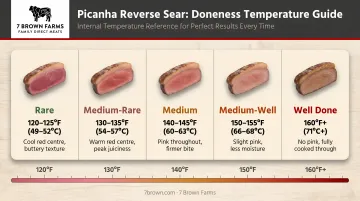
Use a thermometer and pull the picanha when it reaches 125-130°F for medium-rare. The difference between a perfect crust and an overcooked steak is a matter of seconds at these temperatures. Keep tongs ready and thermometer inserted. Don't walk away.
Resting, Slicing, and Serving Your Picanha
Rest after the sear: Tent the picanha loosely with foil and rest for 10-15 minutes. Resting allows the juices redistributed by heat to stabilize. Muscle fibers relax and widen, pulling liquid back from the center toward the edges. Cut too early, and juice spills onto the cutting board instead of staying in every bite.
Slice against the grain: Identify the grain direction before cutting—the muscle fibers run in a consistent direction across picanha's triangular shape. Slice perpendicular to them into 1-inch thick strips. Cutting against the grain shortens the muscle fibers mechanically, making the meat significantly easier to chew. Keep the fat cap on each slice for visual appeal and flavor.
Serving suggestions: Chimichurri sauce is the traditional Brazilian pairing—bright, acidic, herbaceous, cutting through the richness of the fat cap. Horseradish cream, roasted potatoes, or grilled asparagus also work. The quality of your beef shapes which approach lands best. 7 Brown Farms' American Black Angus picanha, raised on a single Missouri estate and dry-aged a minimum of 14 days, benefits from simple sides that let the beef be the centerpiece.
Frequently Asked Questions
Should you reverse sear picanha?
Yes. Reverse searing works particularly well for picanha because the slow phase gives the thick fat cap time to render before the high-heat sear caramelizes it into a crust, while keeping the lean interior evenly cooked and tender.
What is the best way to cook picanha steak?
For whole picanha roasts, reverse searing is the best method — it gives precise temperature control, even internal doneness, and a deeply caramelized fat cap. For pre-sliced individual steaks, the traditional Brazilian approach of grilling over open fire on skewers is hard to beat.
What internal temperature should I cook picanha to?
Pull from the slow phase at 110–115°F, then sear and remove from heat at 125–130°F for medium-rare. Carryover heat will bring it to the final resting temperature of about 130–135°F.
Do you cook picanha fat side up or fat side down during the slow phase?
Start fat side up during the low-and-slow phase so drippings baste the meat below. Then flip fat side down first during the sear to maximize contact with the hot surface and build the best crust.
Can you reverse sear picanha in the oven?
Yes. Set the oven to 225°F, place the picanha on a rack over a baking sheet, and use a thermometer to pull at 110–115°F internal. Then sear in a ripping hot cast iron skillet on the stovetop for 1–2 minutes per side.
How long does it take to reverse sear a whole picanha?
Total time is typically 1 to 1.5 hours: roughly 45–60 minutes in the low-heat phase, 10–15 minutes of pre-sear rest, 4–6 minutes of total searing, and a final 10–15 minute rest before slicing.